


How Should You Hold a Handgun for Maximum Accuracy?
Accurate handgun shooting is not about raw talent or expensive equipment. It comes down to mastering a handful of fundamentals that experienced shooters apply every time they step up to the firing line. Whether you are a first-time shooter preparing for your inaugural range visit or an intermediate marksman looking to tighten your groups, understanding how to properly hold and fire a handgun is the foundation of every accurate shot.
This guide covers the six core disciplines of handgun accuracy: grip, stance, sight alignment, trigger control, breathing, and follow-through. We will also walk through the most common mistakes that hurt accuracy and provide practical drills you can use to improve, including dry-fire exercises you can practice at home.
Before diving in, remember that the four rules of gun safety always come first. Every technique discussed here assumes you are handling your firearm safely and responsibly.
1. Master the Two-Handed Grip
Your grip is the single most important factor in handgun accuracy. According to firearms training professionals, grip technique accounts for roughly 80% of effective recoil management. A proper grip gives you control over the firearm before, during, and after the shot breaks.
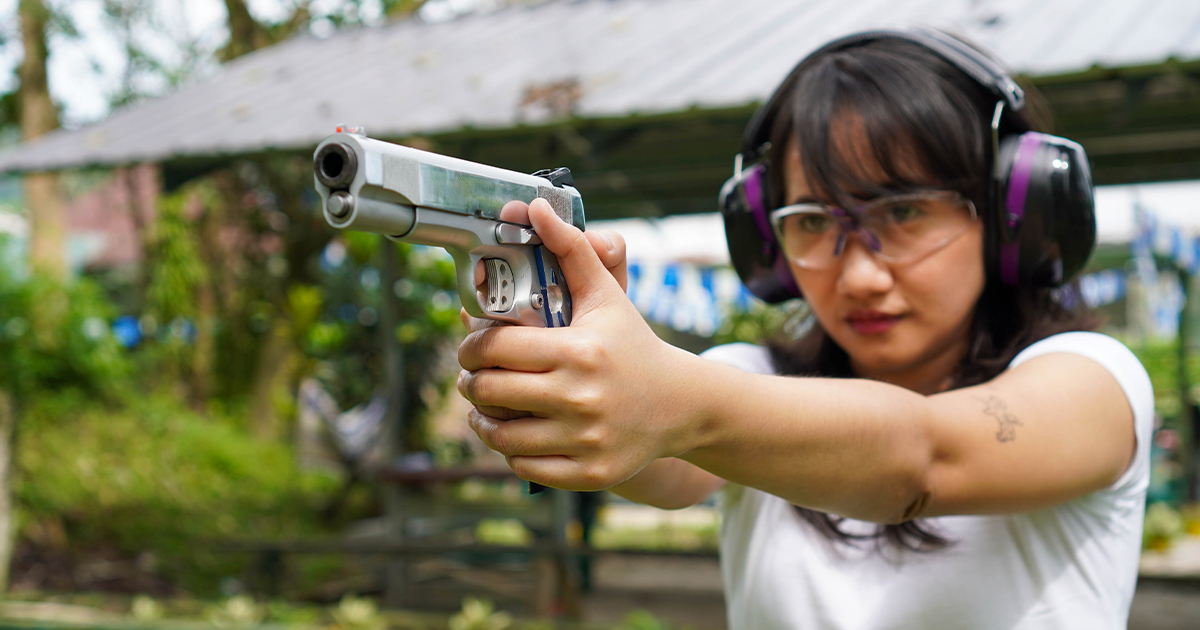
The Dominant Hand: Establish a High Grip
Start by placing your dominant (shooting) hand as high as possible on the backstrap of the pistol. The web of your hand, the fleshy area between your thumb and index finger, should be pressed firmly into the beavertail or tang of the grip. This is called a "high grip," and it serves a critical purpose: the closer your hand sits to the bore axis (the centerline of the barrel), the less leverage recoil has to flip the muzzle upward.
With a high grip, most of the recoil energy drives straight back into your hand rather than rotating the muzzle up and away from the target. This means faster follow-up shots and more consistent accuracy.
Your three lower fingers (middle, ring, and pinky) should wrap firmly around the grip with even pressure. Think of it as a firm handshake, not a white-knuckle death grip. Excessive tension in the hand creates tremors that translate directly to muzzle movement.
The Support Hand: Fill the Gaps
Your support hand does the majority of the stabilization work. Place it against the exposed portion of the grip panel that your dominant hand does not cover. The fingers of your support hand should wrap over the fingers of your dominant hand, and your support-hand palm should press firmly against the grip, angled slightly forward and downward.
The goal is to eliminate any air gaps between your hands and the grip. Every square millimeter of contact between your skin and the firearm helps absorb and redirect recoil energy.
The Thumbs-Forward Position
For semi-automatic pistols, the thumbs-forward grip is the standard recommended by most professional instructors. Your dominant-hand thumb rests along the frame, pointing forward toward the target. Your support-hand thumb sits just below it, also pointing forward.
This position accomplishes several things simultaneously:
- Maximizes hand-to-gun contact by keeping both palms pressed against the grip
- Applies forward pressure that helps counteract muzzle flip
- Keeps thumbs clear of the slide, preventing injury and malfunctions
- Creates a natural index that promotes consistent grip placement shot after shot
Important note for revolvers: Do not use the thumbs-forward grip with a revolver. The cylinder gap releases hot gas laterally during firing, and a thumb positioned forward along the cylinder can result in a serious burn. With revolvers, cross your support thumb over your dominant thumb or tuck both thumbs down.
Grip Pressure and Consistency
A common question is "how tightly should I grip the handgun?" Most instructors recommend about 60-70% of your maximum grip strength. Enough to control the firearm firmly, but not so much that your hands shake from exertion.
More important than the exact pressure is consistency. You want to grip the handgun the same way, with the same pressure, every single time. This builds the muscle memory that allows you to place your hands correctly without thinking, even under stress.
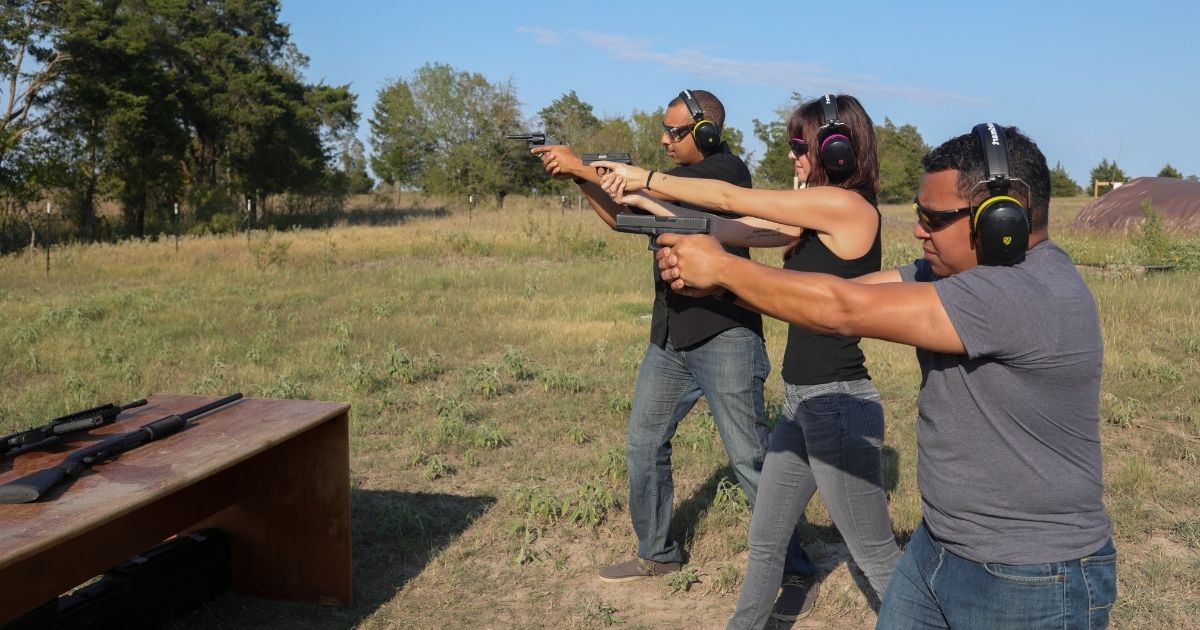
2. Choose and Practice Your Stance
Your stance is the platform from which you shoot. A solid, balanced stance absorbs recoil, keeps you stable, and allows you to transition between targets smoothly. There are three primary handgun shooting stances, each with distinct advantages.
The Isosceles Stance
The isosceles stance is the most commonly taught stance in modern firearms training and the one most instructors recommend for beginners. It is named for the triangle shape your arms create when viewed from above.
- Stand with your feet shoulder-width apart, squared to the target
- Bend your knees slightly and lean your upper body forward just enough to shift your weight onto the balls of your feet
- Extend both arms forward equally, with elbows slightly bent (not locked)
- The handgun is centered directly in front of your face
The isosceles stance is intuitive, easy to remember under stress, and provides excellent stability in all directions. You can rotate your upper body to engage targets to the left and right without repositioning your feet, much like a turret.
The Weaver Stance
Developed by Los Angeles County Deputy Sheriff Jack Weaver in the late 1950s, the Weaver stance uses a push-pull dynamic between your hands. Your shooting arm pushes the firearm forward while your support arm pulls it back, creating isometric tension that helps control recoil.
- Place your dominant foot slightly behind your support foot, with your body bladed approximately 45 degrees to the target
- Your shooting arm is nearly straight, while your support arm's elbow bends downward
- The push-pull tension between your arms stabilizes the handgun
The Weaver stance presents a narrower profile to the target and is favored by some law enforcement and self-defense practitioners. However, it can feel less natural than the isosceles stance and requires more practice to execute consistently.
The Modified Weaver (Chapman Stance)
The Chapman stance is a hybrid that combines elements of both the isosceles and Weaver. Your body is bladed slightly like a Weaver, but your shooting arm is fully extended while your support arm is bent. Many shooters find this to be a comfortable middle ground that offers good recoil control and a stable sight picture.
Which stance is best? The honest answer is the one you can execute consistently under pressure. Try all three at the range and see which feels most natural. Many experienced shooters eventually develop a personal stance that borrows from multiple techniques. For a deeper dive into range fundamentals, see our guide on gun range etiquette.
3. Understand Sight Alignment and Sight Picture
Your grip and stance create the stable platform. Now you need to aim effectively. Handgun marksmanship relies on two related but distinct concepts: sight alignment and sight picture.
Sight Alignment
Sight alignment refers to the relationship between the front sight and the rear sight, independent of the target. Proper sight alignment follows the principle of "equal height, equal light":
- The top of the front sight post should be level with the top of the rear sight notch (equal height)
- There should be an equal amount of space (light) visible on both sides of the front sight post within the rear notch (equal light)
A misalignment of the front sight by as little as 1/100th of an inch can shift bullet impact by several inches at distance. This is why sight alignment is considered more critical than sight picture by most marksmanship instructors.
Sight Picture
Sight picture is the relationship between your properly aligned sights and the target. With standard iron sights, most shooters use a "center hold" where the front sight is placed at the center of the target, or a "six o'clock hold" where the front sight sits just below the bullseye.
The key point that trips up many new shooters: focus your eyes on the front sight, not the target. This sounds counterintuitive because your natural instinct is to stare at what you want to hit. But the human eye cannot focus on three different distances simultaneously (rear sight, front sight, and target). By placing a sharp focus on the front sight, you can verify proper alignment while allowing the target to remain slightly blurry in the background.
This front-sight focus is what separates consistent shooters from those who struggle to produce tight groups. The target does not need to be in sharp focus for you to hit it accurately. The sights do.
A Note on Optics
Red dot optics on handguns are increasingly popular and simplify the aiming process by placing a single point of reference on the target. However, the fundamentals of grip, stance, and trigger control remain equally important regardless of your sighting system.
4. Trigger Control: Press, Don't Pull
If grip is the most important factor for recoil management, trigger control is the most important factor for shot placement. More missed shots are caused by poor trigger manipulation than any other single error.
The Correct Trigger Press
The goal of trigger control is to fire the weapon without disturbing the sight alignment. This means applying smooth, consistent, rearward pressure on the trigger using the pad of your index finger (the area between the fingertip and the first joint).
- Place your finger correctly: Too much finger on the trigger (hooking) pushes it sideways. Too little finger applies uneven pressure. The center of the first pad of your index finger should rest on the trigger face.
- Press straight back: The trigger should travel directly rearward, parallel to the bore. Any lateral movement translates directly to lateral movement of the muzzle.
- Isolate your trigger finger: Only your index finger should move during the trigger press. Your grip fingers should maintain steady, consistent pressure throughout. A common error called "milking" occurs when all fingers contract simultaneously with the trigger finger, disrupting the grip.
- Achieve a surprise break: The shot should "break" as a natural result of steady pressure, not as a deliberate event you time or anticipate. When you know exactly when the gun will fire, you unconsciously brace for it, which moves the muzzle off target.
Trigger Reset
After the shot fires, slowly release the trigger forward until you feel and hear a distinct "click." This is the trigger reset point, where the mechanism re-engages and the trigger is ready to fire again. Learning to ride the reset rather than fully releasing the trigger for each shot minimizes unnecessary finger movement and helps maintain sight alignment between shots.
5. Breathing Technique for Accuracy
Your breathing directly affects your stability. Each breath cycle causes your chest to expand and contract, creating subtle but measurable movement in your arms and hands. For precision shooting, you need to time your shots around this natural movement.
The Natural Respiratory Pause
The most widely taught breathing technique in firearms training is firing during the natural respiratory pause, the brief moment after you exhale and before you inhale again. During this pause, your chest muscles are relaxed, your body is naturally still, and your wobble (the slight natural movement of your sights on target) is at its minimum.
Here is the sequence:
- Take two or three normal breaths to oxygenate and relax
- On your final exhale, let the air flow out naturally without forcing it
- At the bottom of the exhale, there is a natural pause of two to three seconds
- Begin your trigger press during this pause
- If the shot does not break within 8 to 10 seconds, stop, breathe normally, and restart the process
Do not hold your breath. Holding your breath creates internal tension, elevates your heart rate, and causes your vision to deteriorate after just a few seconds. The natural respiratory pause is not a held breath; it is a relaxed pause in your normal breathing cycle.
6. Follow-Through: The Most Neglected Fundamental
Follow-through is often described in one concise phrase: "two sight pictures, one shot." It means maintaining all of your shooting fundamentals (grip, stance, sight alignment, and trigger control) through and after the moment the shot fires.
What Follow-Through Looks Like in Practice
- Maintain your grip pressure: Do not relax your hands the instant the gun fires
- Keep your eyes open: Watch the front sight lift during recoil and track it as it returns to the target
- Hold your trigger to the rear: After the shot breaks, keep the trigger pressed back momentarily before riding it forward to the reset
- Call your shot: Note where your front sight was on the target at the exact moment the gun fired. This is "calling the shot," and it allows you to predict where the bullet hit before you even look at the target
Follow-through ensures that no part of your body relaxes or shifts prematurely while the bullet is still traveling through the barrel. A proper follow-through also sets you up for a faster, more accurate second shot because your grip, stance, and sight picture are already in place.
Common Accuracy Mistakes and How to Fix Them
Even with a solid understanding of fundamentals, most shooters develop bad habits over time. Here are the most frequent accuracy killers and how to diagnose them.
Anticipating Recoil (Flinching)
This is the number-one accuracy problem for shooters at every experience level. When your brain knows the gun is about to fire, it instinctively braces for the noise and recoil, causing you to push the muzzle down and forward just before the shot breaks. The result is shots that consistently land low and left (for right-handed shooters) or low and right (for left-handed shooters).
Fix it: Have a training partner randomly load snap caps (dummy rounds) into your magazine between live rounds. When you press the trigger on a dummy round and the gun does not fire, you will immediately see whether you are flinching. This provides powerful visual feedback that is hard to ignore. Dry-fire practice also helps desensitize the anticipation response.
Jerking the Trigger
Jerking happens when a shooter rushes the trigger press to "get the shot over with." Instead of a smooth, continuous press, the trigger is yanked rearward in one abrupt motion, pulling the muzzle off target at the last moment.
Fix it: Slow down. Place a spent brass casing or a coin on the front sight and practice your trigger press during dry-fire. If the casing falls off, your press is too abrupt. Work on making the shot a surprise.
Poor Grip Consistency
If your groups are scattered with no discernible pattern, the issue may be inconsistent grip placement. Even small variations in hand position between shots can cause significant shifts in point of impact.
Fix it: Develop a deliberate "grip check" routine. Each time you raise the firearm, consciously verify: high grip, thumbs forward, no air gaps, 60-70% pressure. Over time, this becomes automatic.
Looking at the Target Instead of the Front Sight
New shooters almost universally focus on the target rather than the front sight. The result is an inability to verify sight alignment, which leads to scattered shots.
Fix it: After each shot, ask yourself: "Was my front sight in sharp focus?" If you cannot answer yes, you were target-focused. Consciously redirect your eye to the front sight before every shot until it becomes habitual.
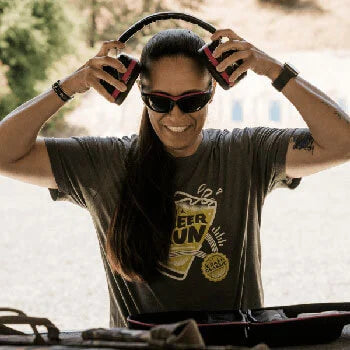
Neglecting Safety Gear
This one does not directly affect accuracy in the traditional sense, but it absolutely affects your performance. Flinching and anticipation are dramatically worse when a shooter is uncomfortable, and inadequate ear protection is a leading cause of shooter discomfort. Gunshots produce 140 to 175 decibels depending on caliber. According to the National Institute for Occupational Safety and Health (NIOSH), a single gunshot above 140 dB can cause immediate, permanent hearing damage.
When you are not confident in your hearing protection, your body's flinch response intensifies. Wearing properly rated ear protection is not just a safety issue; it is an accuracy issue. The same applies to eye protection when shooting in dynamic scenarios where debris, ejected brass, or fragmentation could cause you to flinch.
Dry-Fire Practice: Build Accuracy Without Ammunition
Dry-fire practice, the act of practicing with a verified unloaded firearm, is one of the most effective training methods available. It eliminates recoil and muzzle blast from the equation, allowing you to isolate and improve individual fundamentals.
Setting Up a Safe Dry-Fire Session
- Remove ALL ammunition from the room, not just from the firearm
- Visually and physically verify the firearm is unloaded. Check the chamber, check the magazine well
- Choose a safe direction/backstop that would safely stop a bullet if one were accidentally discharged
- Set a defined start and end to your practice session to maintain discipline
Effective Dry-Fire Drills
The Coin Drill: Balance a coin on your front sight. Practice your trigger press without letting the coin fall. This teaches smooth trigger manipulation and reveals any flinch or jerk in your press.
Wall Drill: Stand approximately one arm's length from a blank wall. Focus on the front sight against the wall and press the trigger. Without a target to fixate on, your brain naturally focuses on the front sight and the quality of your trigger press.
Draw and Present: Practice drawing from your holster (if applicable) and establishing your grip, stance, and sight picture. This builds the muscle memory that allows you to get on target quickly and consistently.
Target Transitions: Set up two or three small targets on a wall. Practice moving your sights smoothly from one target to the next, establishing a sight picture on each before pressing the trigger.
Even 10 to 15 minutes of focused dry-fire practice three to four times per week will produce measurable improvement in your live-fire accuracy. Many competitive shooters dry-fire more than they live-fire.
Putting It All Together at the Range
Theory becomes skill only through deliberate practice. When you head to the range, resist the urge to blast through ammunition as fast as possible. Instead, approach each session with specific goals.
Start at close range (5 to 7 yards) and focus on one fundamental at a time. Shoot a group while concentrating entirely on your grip. Shoot another while focusing on your trigger press. Shoot another while concentrating on your breathing. This isolation approach helps you identify which fundamental needs the most work.
As your groups tighten, gradually increase distance. A shooter who can produce a consistent 3-inch group at 7 yards has solid fundamentals. A shooter who can maintain that at 15 yards is well above average. At 25 yards, you are in the realm of advanced marksmanship.
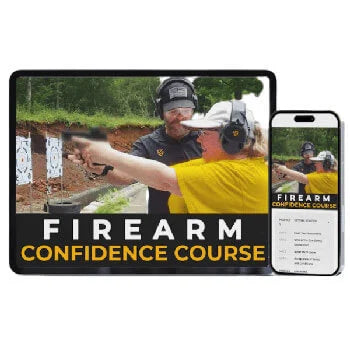
If you are new to range shooting or want a structured foundation, the TradeSmart Range Confidence Course covers firearms fundamentals in a clear, accessible format that complements your live-fire practice. And if you are still selecting your first firearm, our guide on the best beginner handguns can help you choose one that fits your hand, your budget, and your intended use.
The Role of Proper Safety Gear in Shooting Accuracy
We touched on this earlier, but it is worth emphasizing: your safety gear directly affects how well you shoot.
According to the National Institute on Deafness and Other Communication Disorders (NIDCD), approximately 40 million Americans aged 20 to 69 have noise-induced hearing loss. Recreational shooters are four times more likely to develop hearing loss than non-shooters. These are not abstract statistics for someone spending time at the range.
When your hearing protection is insufficient, whether it does not achieve an adequate Noise Reduction Rating (NRR) or does not seal properly, you hear more of the blast. Your body responds to that excessive noise with an involuntary flinch. That flinch degrades your accuracy far more than any minor technical flaw in your stance or grip.
Similarly, ANSI Z87.1-certified eye protection shields you from ejected brass, powder residue, and fragmentation. Without it, even experienced shooters develop a subconscious squinting or blinking habit that disrupts sight focus and trigger timing.
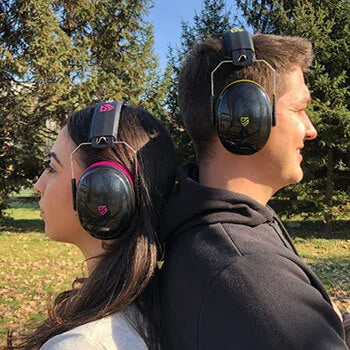
TradeSmart Safety shooting kits pair NRR 28 earmuffs with ANSI Z87.1+ impact-resistant safety glasses, ensuring your ears and eyes are properly protected so you can focus entirely on your fundamentals. Every kit also includes TradeSmart's NRR 33 foam earplugs for doubling up in louder environments (indoor ranges or large-caliber firearms), plus a hard-shell carrying case to keep everything organized.
Explore the full lineup:
- Shooting Earmuff and Eye Protection Kit for a complete ear and eye solution
- Electronic Ear and Eye Protection for shooters who want to hear range commands clearly while maintaining full hearing protection
- Premium Indoor Kit (Clear Lenses) for optimal clarity on indoor ranges
All TradeSmart Safety products are backed by a 10-year warranty with free shipping, and every kit includes complimentary access to the Range Confidence Course.
Frequently Asked Questions
How should you hold a handgun for maximum accuracy?
Hold the handgun with a firm two-handed grip, placing your dominant hand as high as possible on the backstrap and wrapping your support hand around the remaining exposed grip with no air gaps. Use the thumbs-forward position for semi-automatics. Maintain about 60-70% of your maximum grip strength consistently, and ensure your grip is identical from shot to shot to build reliable muscle memory.
What is the best shooting stance for a beginner?
The isosceles stance is generally recommended for beginners because it is the most natural and intuitive. Stand squared to the target with feet shoulder-width apart, knees slightly bent, and both arms extended evenly. This stance provides excellent stability, is easy to remember under stress, and allows you to rotate your upper body to engage targets at different angles without repositioning your feet.
Should I focus on the front sight or the target when aiming?
Focus on the front sight. While this feels counterintuitive, your eyes cannot simultaneously focus on three different distances (rear sight, front sight, and target). A sharp focus on the front sight allows you to verify proper sight alignment ("equal height, equal light"), which is the most critical factor in aiming accuracy. The target will appear slightly blurry, but that does not prevent accurate shot placement.
How do I stop flinching when shooting?
Flinching (anticipating recoil) is best addressed through dry-fire practice and the "ball and dummy" drill. Have a training partner randomly load snap caps among live rounds in your magazine. When you press the trigger on a dummy round, any flinch becomes immediately visible. Regular dry-fire practice also helps by training your body to press the trigger without bracing for recoil. Wearing adequate ear protection, such as NRR-rated earmuffs, also reduces the noise-induced flinch response.
What is the natural respiratory pause in shooting?
The natural respiratory pause is the brief moment (approximately 2 to 3 seconds) after you exhale and before your next inhale. During this pause, your chest muscles are relaxed and your body is naturally still, minimizing the movement of your sights on target. Most marksmanship training teaches shooters to begin their trigger press during this pause. If the shot does not break within 8 to 10 seconds, you should stop, resume normal breathing, and restart the process.
Does dry-fire practice actually improve accuracy?
Yes. Dry-fire practice is considered one of the most effective training methods by competitive and professional shooters alike. It isolates fundamentals like trigger control, sight alignment, and grip without the distraction of recoil and muzzle blast. Drills like the coin balance exercise (placing a coin on the front sight and pressing the trigger without dropping it) provide immediate feedback on trigger technique. Even 10 to 15 minutes of focused dry-fire, three to four times per week, will produce measurable improvement in live-fire accuracy.
Build Your Skills with Confidence
Handgun accuracy is a skill, not a gift. It is built through understanding the fundamentals, practicing them deliberately, and wearing the right safety gear so your body can stay relaxed and focused at the range.
TradeSmart Safety is built for shooters who take their range time seriously. Every TradeSmart shooting kit includes NRR-rated hearing protection, ANSI Z87.1+ eye protection, and free access to the Range Confidence Course, so you have everything you need to train effectively and safely from day one.
Shop TradeSmart Safety gear and start shooting with the protection and confidence your accuracy depends on.


Leave a comment (all fields required)