


Plate Carrier Setup: The Complete Guide to Choosing, Fitting, and Customizing Your Gear in 2026
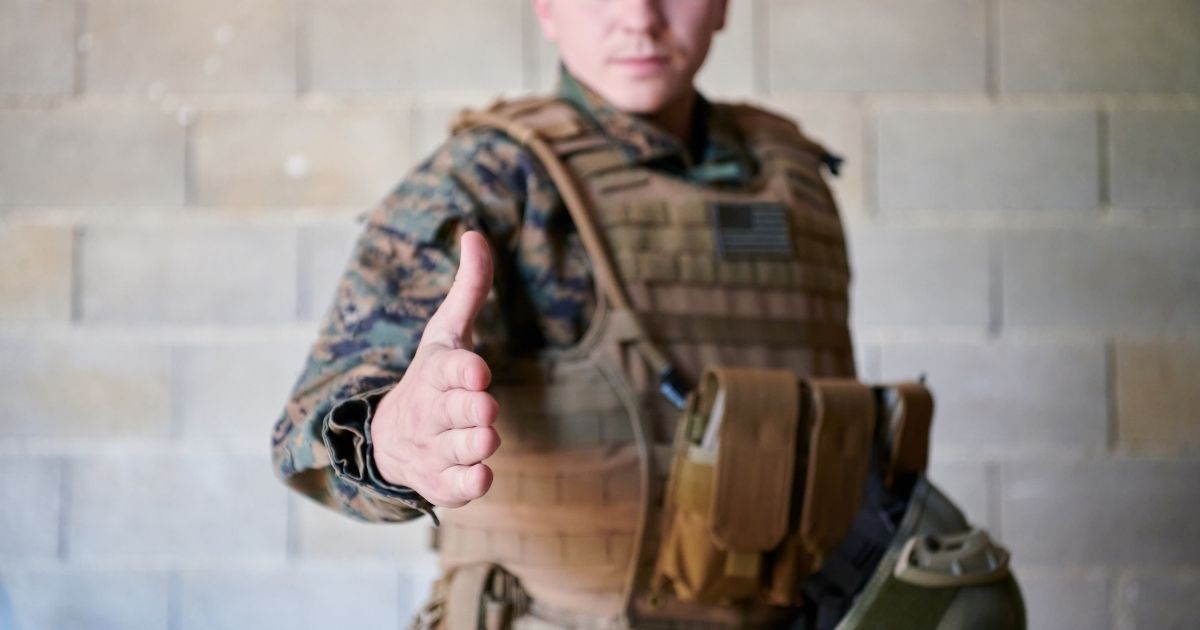
A plate carrier is more than a piece of equipment. It is the foundation of your personal protection system, and getting the setup right can mean the difference between a loadout that works under pressure and one that fights you every step of the way.
Whether you are building your first plate carrier for home defense, range training, or professional duty, this guide covers everything you need to know: how to choose the right carrier, how to measure and fit plates correctly, how to organize your MOLLE attachments for maximum efficiency, and how to manage weight so you can still move, shoot, and communicate effectively.
How to Choose the Right Plate Carrier
Choosing a plate carrier starts with understanding your intended use. A law enforcement officer running a 12-hour shift needs something very different from a civilian building a home defense setup or a competition shooter looking for lightweight mobility.
Key Factors to Consider
- Mission profile: Are you building a full combat loadout, a slick concealed setup, or a modular system that can scale up and down depending on the situation?
- Material and construction: Look for 500D or 1000D Cordura nylon for durability. Laser-cut MOLLE panels save weight compared to traditional sewn webbing while offering the same attachment versatility.
- Modularity: The best plate carriers in 2026 allow you to swap cummerbunds, add or remove placard systems, and scale your loadout without buying a completely new carrier.
- Quick-release systems: A pull-cable or quick-release buckle system allows rapid doffing in an emergency, whether that is a medical situation or water immersion.
- Ventilation and padding: Especially important if you train in warm climates. Mesh-lined back panels and padded shoulder straps reduce heat buildup and distribute weight more comfortably over long periods.
If you are new to tactical gear, start with a versatile mid-range carrier that accepts standard 10" x 12" plates and offers MOLLE compatibility on both the front and back panels. This gives you room to grow your setup as your needs evolve.
Understanding Plate Cuts: SAPI vs. Shooter's Cut vs. Swimmer's Cut
The shape of your armor plates affects both coverage and mobility. There are three primary plate cuts you will encounter, and each serves a different purpose.
SAPI Cut
SAPI (Small Arms Protective Insert) is the standard plate shape developed by the U.S. Department of Defense. SAPI plates feature a distinctive rectangular shape with clipped top corners and full 90-degree bottom corners. This design maximizes torso coverage, making it the standard for military use.
SAPI plates come in five standard sizes:
- Extra Small: 7.25" x 11.5"
- Small: 8.75" x 11.75"
- Medium: 9.5" x 12.5"
- Large: 10.125" x 13.25"
- Extra Large: 11" x 14"
Because SAPI plates prioritize coverage over mobility, sizing them correctly is especially important. A SAPI plate that is too large will dig into your arms and restrict weapon manipulation.
Shooter's Cut
Shooter's cut plates feature angled corners on both the top and bottom edges, creating a more tapered profile. The top corner cuts keep your shoulder pocket clear when shouldering a rifle, which is why this cut is popular among competitive shooters, law enforcement, and armed civilians.
Most shooter's cut plates are available in 8" x 10" (small) and 10" x 12" (medium/large) sizes. Because the cut is more forgiving on arm mobility, sizing is slightly more lenient than with SAPI plates.
Swimmer's Cut
Swimmer's cut takes the concept further with a more aggressive angle that extends down the side of the plate rather than just clipping the corner. This provides maximum shoulder and arm mobility, making it ideal for rescue teams, maritime operators, and anyone who needs unrestricted upper-body movement.
The tradeoff is slightly less lateral coverage compared to SAPI or shooter's cut plates. Swimmer's cut plates are most commonly found in 8" x 10" and 10" x 12" dimensions.
Which Cut Should You Choose?
- SAPI: Best for maximum protection and military-standard compatibility. Ideal if coverage is your top priority.
- Shooter's cut: The best all-around choice for most civilians and law enforcement. Balances protection with the ability to shoulder a rifle comfortably.
- Swimmer's cut: Best for high-mobility roles where unrestricted arm movement matters more than maximum plate coverage.
How to Measure for Proper Plate Carrier Fit
Getting the right fit is non-negotiable. A plate carrier that is too large leaves gaps in protection and bounces during movement. One that is too small restricts breathing and fails to cover your vital organs. Here is how to measure correctly.
Step 1: Measure Your Chest Width
Using a flexible tape measure, measure the horizontal distance from nipple to nipple across your chest. This measurement determines your plate width. The plate should cover the span between your nipples, which corresponds to the area protecting your heart and lungs.
Step 2: Measure Your Torso Length
Find your sternal notch, the soft indentation at the base of your throat where your collarbones meet. Measure straight down from the sternal notch to your navel. Subtract 2 to 3 inches from this measurement. The result is the ideal vertical height for your plate.
Step 3: Match Your Measurements to Plate Size
For most adult males, a 10" x 12" plate (medium SAPI) provides proper coverage. Smaller-framed individuals may need 8" x 10" plates, while larger individuals may require large or extra-large SAPI dimensions. Do not assume that bigger plates mean better protection. An oversized plate restricts movement and creates pressure points that become painful quickly.
Step 4: Size Your Carrier to Your Plates
Your plate carrier must match your plate size. Most manufacturers offer their carriers in small, medium, and large configurations that correspond to standard plate dimensions. Always check the manufacturer's sizing chart and confirm that your plates fit snugly inside the carrier's plate bags without excessive movement.
Proper Plate Positioning: Front and Back
Even the best plates are useless if they are not positioned correctly. The goal is to cover your cardiac box, the area containing your heart, lungs, and major blood vessels.
Front Plate Positioning
- Top edge: The top of the front plate should sit at or just below the sternal notch (the soft spot at the base of your throat). You should be able to place one finger between the top of the plate and the notch.
- Bottom edge: The bottom of the plate should sit approximately 2 to 3 inches above your navel. This protects your diaphragm while allowing you to bend at the waist.
- Lateral position: The plate should be centered on your sternum, with equal coverage on both sides of your chest.
Back Plate Positioning
- Top edge: Should align roughly with the same height as the front plate. Use the prominent vertebra at the base of your neck (C7) as a reference point. The top of the back plate should sit just below it.
- Bottom edge: Should match the bottom edge of the front plate when viewed from the side.
- Centering: The plate should be equidistant from your spine on both sides.
Common mistake: Wearing the plate carrier too low. If your front plate sits below the sternal notch, your heart and upper lungs are exposed. Tighten your shoulder straps until the top of the front plate reaches the correct height.
Cummerbund Options and Selection
The cummerbund wraps around your torso and secures the plate carrier in place. It is also a critical area for side protection and additional storage. There are several types to consider.
Types of Cummerbunds
- Elastic cummerbund: Lightweight, low-profile, and comfortable. Works well for slick setups and concealed carry under a jacket. Limited attachment options.
- MOLLE cummerbund: Offers rows of MOLLE webbing for attaching side pouches, mag carriers, or radio holsters. Heavier but far more versatile.
- Skeletal cummerbund: A hybrid design using individual straps or skeletal frames. Provides ventilation and moderate attachment capability without the bulk of a full MOLLE cummerbund.
- Side-plate cummerbund: Designed to hold 6" x 6" or 6" x 8" side plates for additional lateral protection. Adds weight but significantly improves coverage.
Adjusting Your Cummerbund
The cummerbund should be snug enough that the carrier does not shift during movement, but loose enough to allow full, unrestricted breathing. A good test: you should be able to slide a flat hand between the cummerbund and your body, but not a fist. Tighten the Velcro or buckle closures evenly on both sides so the carrier sits symmetrically.
Load Distribution: How to Balance Weight Effectively
Poor weight distribution is the number one reason people abandon their plate carriers during training. A fully loaded carrier can weigh between 15 and 30 pounds depending on your plates and accessories, so balance matters.
Core Principles of Load Distribution
- Keep weight centered and close to your body. Heavy items like magazines and plates should sit as close to your torso as possible. The further weight sits from your center of gravity, the more energy you expend to stabilize it.
- Balance front to back. If you run three loaded magazine pouches on your front panel, consider adding a hydration carrier or utility pouch to the rear panel to counterbalance. An unbalanced carrier tilts forward, straining your lower back.
- Balance left to right. Avoid loading all of your pouches on one side. Distribute weight evenly across the cummerbund and side panels.
- Place heavy items low, frequently accessed items high. Heavier gear like spare magazines should sit in the lower rows of your MOLLE panel. Items you need to grab quickly, like a tourniquet or radio, should sit higher and more accessible.
MOLLE Placement Strategy: Building an Efficient Layout
MOLLE (Modular Lightweight Load-carrying Equipment) webbing gives you a grid system for attaching pouches, holsters, and accessories to your plate carrier. The key is not to fill every available row, but to place each item where it serves you best under stress.
Front Panel Layout
Your front panel is prime real estate. Every item placed here must earn its position because front-panel bulk affects your ability to go prone, shoulder your weapon, and move through tight spaces.
- Magazine pouches: Center-front, in the lower rows. Position them so your support hand naturally indexes the top of the magazine when you reach for a reload. Most setups run two to three rifle mag pouches here.
- Admin pouch: Upper front panel, above your magazine pouches. Use this for small essentials: a pen, notepad, chem lights, spare batteries, or a small flashlight. Keep it flat to avoid interfering with your rifle stock when shouldered.
- Placard or chest rig: Many modern carriers accept modular placards that clip onto the front panel, allowing you to swap your entire magazine and pouch configuration in seconds. If your carrier supports this, consider investing in a placard system for versatility.
Side and Cummerbund Layout
- Radio pouch: Non-dominant side cummerbund or shoulder strap. This keeps the radio accessible with your support hand while your dominant hand stays on the weapon.
- Pistol magazine pouches: Cummerbund, non-dominant side. Keeps them out of the way but within reach during a secondary weapon transition.
- Tourniquet holder: Accessible from both sides. Many operators mount a CAT tourniquet on the front shoulder strap or high on the cummerbund for rapid one-handed access.
Rear Panel Layout
- IFAK (Individual First Aid Kit): The rear lower panel is a widely recommended IFAK location. Mounting your medical kit on the back allows access with either hand (reach behind and pull), and it can also be accessed by a buddy if you are incapacitated. Some operators prefer mounting it on the side cummerbund for faster personal access. Whichever location you choose, the critical rule is: your IFAK must be reachable with either hand.
- Hydration carrier: Rear panel, centered. A low-profile 1.5L to 3L bladder with a routing tube keeps you hydrated without adding front-panel bulk.
- General purpose pouch: Rear panel, for items you do not need immediate access to: extra medical supplies, a rain layer, or flex cuffs.
Essential Pouches and Accessories
You do not need to mount every accessory that exists. A disciplined loadout is a fast loadout. Here are the essentials that belong on most plate carrier setups.
Magazine Pouches
For most civilian and law enforcement applications, two to three rifle magazine pouches on the front panel and one to two pistol magazine pouches on the cummerbund are sufficient. Open-top pouches with retention cords offer the fastest reloads. Flap-covered or Kydex-insert pouches provide better retention during physical activity.
IFAK (Individual First Aid Kit)
Every plate carrier setup should include an IFAK. At a minimum, your IFAK should contain:
- A CAT tourniquet (or SOFTT-W)
- Hemostatic gauze (QuikClot or Celox)
- Compressed gauze
- Chest seals (vented, two-pack for entry and exit wounds)
- Emergency pressure bandage (Israeli bandage)
- Nasopharyngeal airway (NPA) with lubricant
- Medical shears and nitrile gloves
Having an IFAK is only useful if you know how to use it. Consider taking a Tactical Combat Casualty Care (TCCC) or Stop the Bleed course.
Radio, Admin, and Dump Pouches
A MOLLE radio pouch on your cummerbund or shoulder strap keeps your handheld radio secure and accessible. Route the PTT cable and antenna so they do not snag on your rifle sling. A low-profile admin pouch on your upper chest panel holds small essentials like pens, chem lights, and spare batteries. Keep it flat to avoid interfering with going prone. A collapsible dump pouch on your support-hand side gives you a place to stash empty magazines during a reload. It folds flat when not in use and deploys with one pull.
Weight Management: Keeping Your Loadout Effective
A fully loaded plate carrier can weigh anywhere from 15 to 30 or more pounds. Every ounce matters when you are training, competing, or operating for extended periods.
Typical Weight Breakdown
- Carrier alone: 1 to 4 lbs (depending on model)
- Ceramic plates (front and back): 10 to 16 lbs total
- Loaded magazines (3 rifle, 2 pistol): 4 to 6 lbs
- IFAK: 1 to 2 lbs
- Radio, hydration, misc accessories: 2 to 5 lbs
- Total loaded weight: 18 to 33 lbs
Strategies for Reducing Weight
- Choose lighter plates. Modern multi-curve polyethylene plates can weigh as little as 3.5 lbs each while still providing Level III+ protection. Ceramic composites offer Level IV protection at 6 to 8 lbs per plate.
- Audit your loadout ruthlessly. If you have not used an item in your last three training sessions, remove it. Carrying gear "just in case" adds weight that slows you down in every scenario.
- Use lightweight pouch systems. Modern Kydex and thermoplastic magazine inserts weigh a fraction of traditional fabric pouches while providing faster reloads.
- Consider a placard system. Swapping a full MOLLE front panel of individual pouches for a single integrated placard can save 4 to 8 ounces while improving organization.
Training Considerations: Building Proficiency Under Load
Owning a plate carrier is not the same as being proficient with one. If you plan to rely on your plate carrier in a real scenario, you need to train with it regularly.
Start Slow and Build
If you are new to training with armor, start by wearing your loaded plate carrier around the house for 30 to 60 minutes at a time. Get accustomed to the weight, the restriction, and the way it changes your movement patterns before hitting the range or the gym.
A common guideline is to keep your total loaded carrier weight at or below 10 to 15 percent of your body weight for sustained training sessions. For a 180-pound individual, that means a 18 to 27-pound loadout is manageable. Going heavier is possible for short, intense drills, but extended sessions at high weight lead to fatigue, poor form, and injury.
Range Training With Your Plate Carrier
- Practice reloads. Magazine changes feel different when pouches sit on a plate carrier versus a belt rig. Drill your reload sequence until it becomes automatic.
- Go prone. Make sure your front panel setup does not prevent you from getting into a stable prone position. If your magazine pouches are too bulky, you will rock on them instead of getting flat.
- Run transitions. Practice transitioning from rifle to sidearm while wearing your full loadout. The sling, the carrier, and the holster all interact, and you need to know where snag points exist.
- Shoot on the move. The added weight changes your center of gravity. Practice controlled movement drills to learn how the carrier affects your balance and shooting platform.
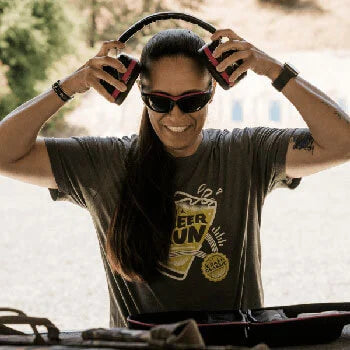
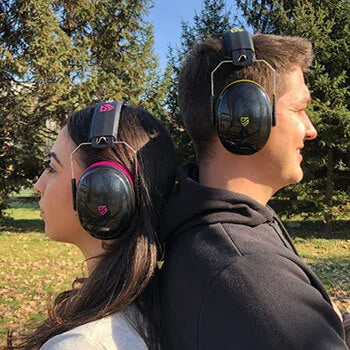
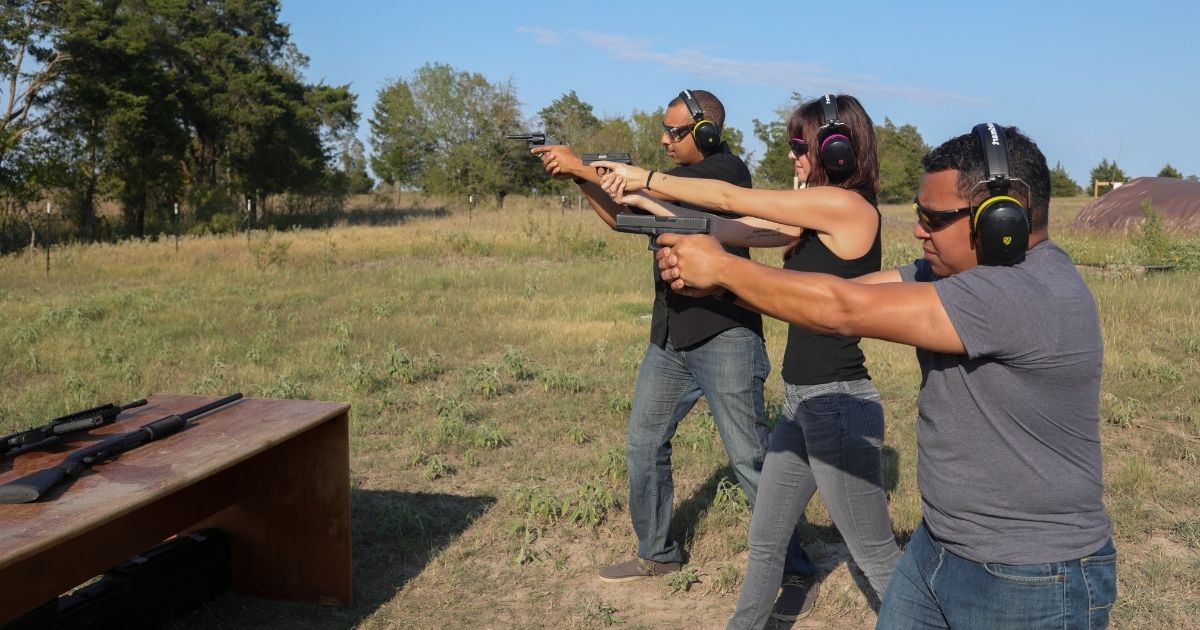
When training with firearms, always prioritize safety fundamentals. Proper ear protection is non-negotiable at the range, as a single gunshot produces 140 to 175 dB of sound, which can cause immediate and permanent hearing damage. According to NIOSH, hearing protection should be worn at any exposure above 85 dB. Doubling up with earmuffs and earplugs provides effective NRR protection that can reach approximately NRR 36 when combined.
The same goes for eye protection. ANSI Z87.1-rated safety glasses protect against high-velocity impact, including ricochets and ejected brass that become more likely in dynamic shooting drills.
Physical Fitness Under Load
Training with a plate carrier is also excellent for building functional strength and endurance. Ruck marches, bodyweight exercises, and sprint drills performed in your carrier build the specific conditioning you need to perform under load. Plan at least one to two rest days per week, and pay close attention to hydration. The added weight increases your body's demand for water, especially in warm weather.
Top Plate Carrier Recommendations for 2026
These are among the most proven and widely recommended plate carriers available right now, each serving a different use case.
Crye Precision JPC 2.0 — Best All-Around
The JPC 2.0 remains the gold standard for a reason. Weighing just over one pound without plates, it offers an excellent balance of protection, modularity, and comfort. The integrated admin pouch, zip-on back panel capability, and hypalon pull tabs make it a highly refined platform. Available in small, medium, large, and extra-large to fit standard SAPI plates.
Best for: Civilian preparedness, law enforcement, military use, or anyone who wants a proven all-around carrier.
Ferro Concepts Slickster — Best Low-Profile
At just 0.8 pounds, the Slickster is one of the lightest carriers on the market. Its streamlined profile makes it easy to conceal under a jacket. The ADAPT system lets you add cummerbunds, MOLLE panels, and magazine pouches as needed, making it scalable from a slick covert setup to a moderately loaded patrol configuration.
Best for: Concealed carry, low-profile setups, and users who want a scalable system that starts minimal.
Spiritus Systems LV-119 — Best Modular
The LV-119 is built around the concept of modularity. The overt and covert front and rear bags, combined with Spiritus's ecosystem of micro fight chassis placards and cummerbunds, let you build an almost infinite number of configurations. It also features a quick-release system for emergency doffing.
Best for: Users who want maximum customization options and are willing to invest in a modular ecosystem.
Velocity Systems Scarab LT — Best for Heavy Loadouts
The Scarab LT is designed for extended operations where you need to carry more gear for longer periods. It features a padded harness system, reinforced MOLLE panels, and a cummerbund designed for side plate integration. The robust construction handles heavy loadouts without sagging or shifting.
Best for: Multi-day operations, heavy gear requirements, and users who prioritize load-bearing capacity over minimalism.
Defense Mechanisms MEPC — Best Value
The Mission Essential Plate Carrier offers features typically found in carriers costing twice as much. It accepts standard placards, offers structural cummerbund options, and comes in at a price point that makes it accessible for first-time buyers who still want a quality platform.
Best for: Budget-conscious buyers who want a capable carrier without cutting corners on quality.
Complete Your Range Setup Beyond the Plate Carrier
Your plate carrier is just one part of a complete tactical setup. To get the most out of your training, you need gear that works together.
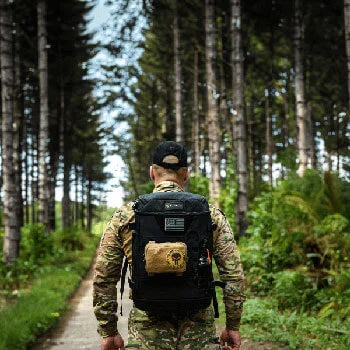
A well-organized tactical backpack keeps your spare gear, tools, and supplies organized and accessible. Pairing your carrier with a tactical vest setup for lighter training days gives you flexibility in how you approach different range sessions. And comfortable tactical pants with reinforced knees and stretch fabric make a noticeable difference when you are running drills that involve kneeling, crouching, and going prone.
For home defense planning, your plate carrier should be part of a broader strategy that includes reliable home defense firearms, a staged quick-access setup, and communication devices so everyone in the household knows the plan.
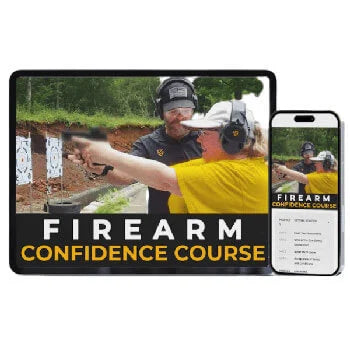
Do not overlook hearing and eye protection, either. TradeSmart Safety's shooting ear and eye protection kits include NRR 28-rated earmuffs, ANSI Z87.1+ certified safety glasses, and a protective carrying case. Every kit also comes with a free Range Confidence Course covering firearms fundamentals, making them an excellent addition to any range bag. With a 10-year warranty and free shipping, it is a practical investment in your long-term safety.
If you are running dynamic drills where communication matters, the TacticalEdge electronic earmuffs with NRR 24 protection offer sound amplification and directional microphones so you can hear range commands and teammates clearly while staying protected from gunfire.
Frequently Asked Questions
What size plate carrier do most people need?
The majority of adult males fit a medium plate carrier designed for 10" x 12" plates (equivalent to SAPI medium at 9.5" x 12.5"). However, you should always measure your chest width (nipple to nipple) and torso length (sternal notch to navel, minus 2 to 3 inches) before purchasing. A plate that is too large restricts movement, while one that is too small leaves vital organs exposed.
How should a plate carrier fit when properly adjusted?
The top of the front plate should sit at or just below the sternal notch. You should be able to fit one finger between the top of the plate and the notch. The bottom of the plate should end 2 to 3 inches above your navel. The cummerbund should be snug enough to prevent shifting but loose enough for natural breathing. You should be able to slide a flat hand, but not a fist, between the cummerbund and your torso.
What is the difference between SAPI, shooter's cut, and swimmer's cut plates?
SAPI plates are the military-standard shape with full rectangular corners on the bottom, offering maximum coverage. Shooter's cut plates have angled top and bottom corners, providing better arm mobility when shouldering a rifle. Swimmer's cut plates have the most aggressive angle, extending further down the side for maximum shoulder freedom at the cost of slightly less coverage. Most civilians and law enforcement professionals do well with shooter's cut plates.
How much weight should a fully loaded plate carrier have?
A typical fully loaded plate carrier weighs between 18 and 30 pounds, including the carrier, plates, magazines, IFAK, and accessories. For sustained training, aim to keep your total loadout at 10 to 15 percent of your body weight. Modern lightweight polyethylene plates (3.5 to 5 lbs each) can significantly reduce total weight compared to traditional steel or heavier ceramic options.
Where should I mount my IFAK on a plate carrier?
The most common and recommended locations are the rear lower panel or the side cummerbund. The critical requirement is that your IFAK must be accessible with either hand, in case one arm is injured or incapacitated. Practice drawing your IFAK contents with both hands before committing to a placement. Many operators also mount a spare tourniquet on the front shoulder strap for immediate one-handed access.
Can I wear a plate carrier for workouts and fitness training?
Yes, training with a plate carrier builds functional strength and conditioning that translates directly to real-world performance. Start with your carrier and plates only (no accessories) and perform basic movements: walking, light jogging, push-ups, and squats. Gradually increase duration and intensity. Ensure proper shoulder strap and cummerbund adjustment, stay hydrated, and allow adequate rest days to prevent overuse injuries.
Build Your Setup Right the First Time
A properly set up plate carrier is a system, not a single purchase. It takes deliberate planning, correct measurements, smart pouch placement, and regular training to make your carrier an asset rather than a burden.
Start with the right fit. Choose plates that match your body and your mission. Build your loadout methodically, placing each pouch where it serves you best under stress. Train with your setup regularly so that every reload, every medical access, and every transition becomes second nature.
And never neglect the fundamentals that protect you at the range. TradeSmart Safety's shooting ear and eye protection kits provide NRR-rated hearing protection and ANSI Z87.1+ certified safety glasses, backed by a 10-year warranty and free shipping on every order. Every kit includes a free Range Confidence Course to sharpen your firearms fundamentals alongside your gear setup.
Shop TradeSmart Safety shooting protection kits here and make sure every part of your training setup is working as hard as you are.


Leave a comment (all fields required)